Setting up a new Static IP Network
This guide will help you setup DNS filtering for networks with a static public IP.
For networks with a dynamic IP follow this guide.
To create a new network the steps are: Set the Public IP Customize Block Page Choose Categories to Filter Set Allow and Block domain lists Configure Time-based Access Final Steps
Set the Public IP
The following steps in this section apply to networks with a static public IP only.
- Click Settings > Networks > Add New Network
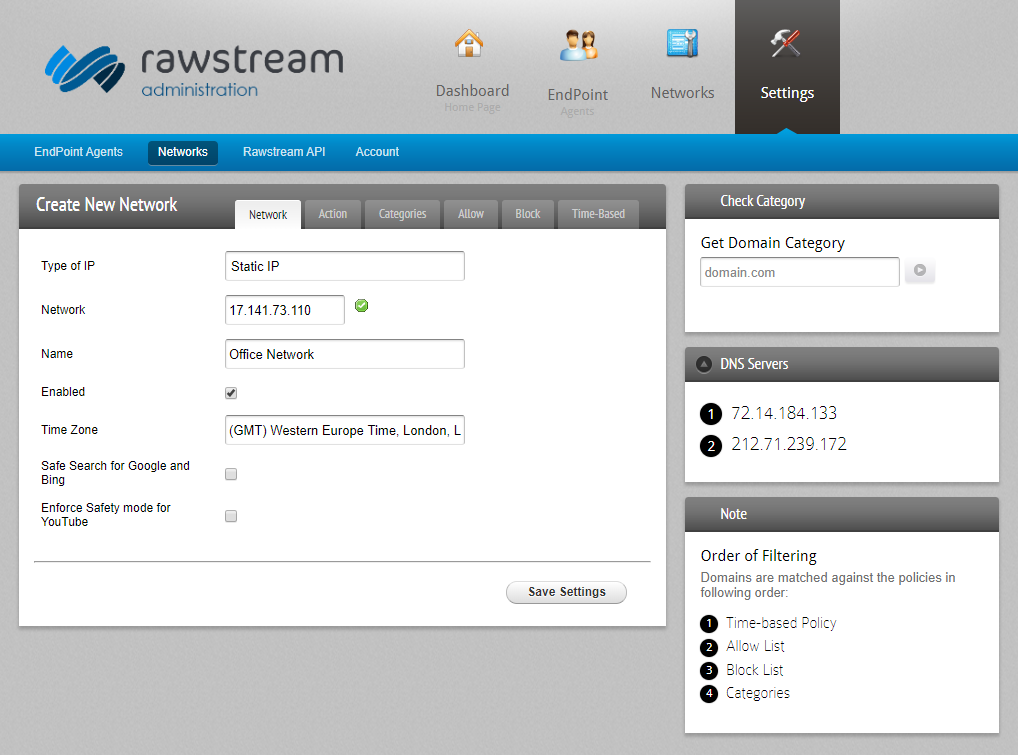
- Enter the public IP address of the network. The IP address is pre-filled.
- Enter a name for the network.
Pick the timezone of the network. You can change the timezone later at any time.
Setting Block Page Content
Select the Action tab
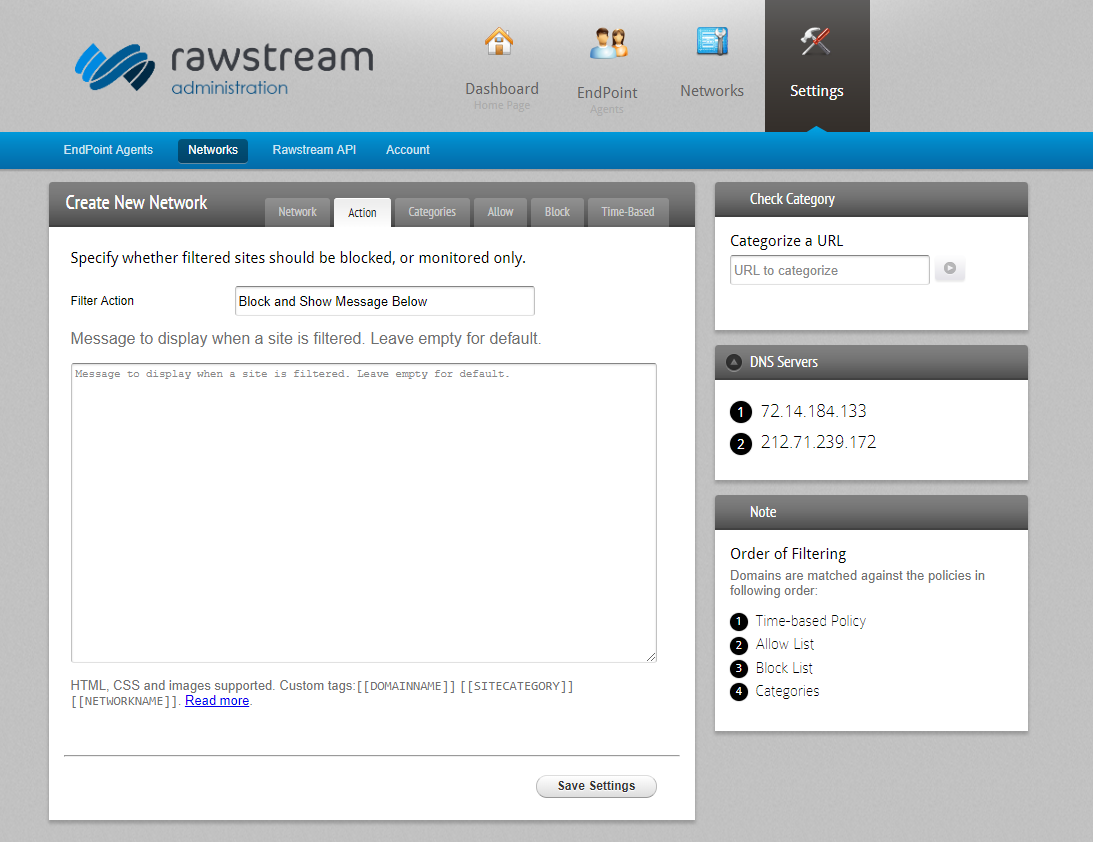
- From the Filter Action dropdown pick whether to Block access, or Monitor mode.
Enter block page content. HTML and CSS are supported. More information on customizing block pages.
Filtering Web Sites by Category
Select the Categories tab
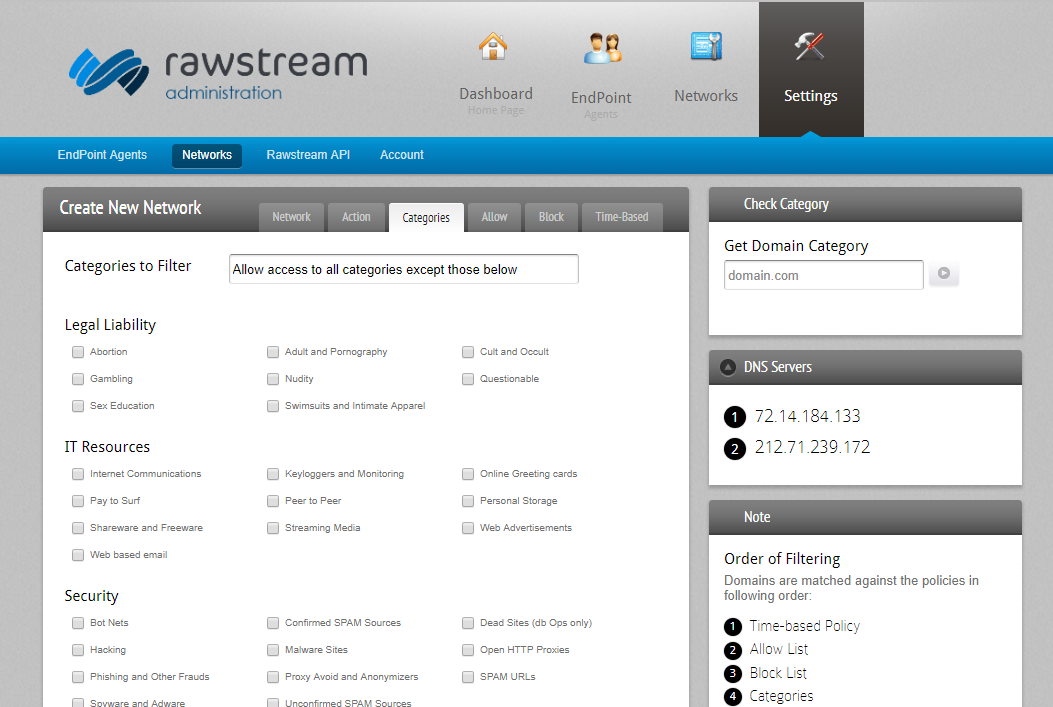
- From the Categories to Filter dropdown, choose whether the policy is to allow access to all categories except those selected, or else whether to block access to all categories except those selected.
Select the categories that you want to include in the policy. A website may be categorised under more than one category.
Setting the Allow and Block domain lists
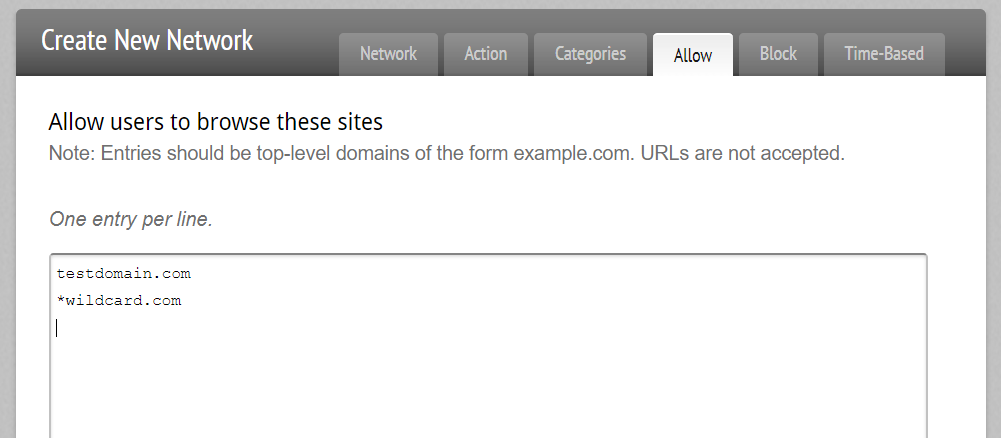
Select the Allow tab
- Enter each bare domain (no http/s or trailing slash) one per line. The wildcard character * is supported.
- Select the Block tab
Enter the domains, one per line, to block. Wildcards are supported.
Time-Based Policy
Select the Time-Based tab. This tab allows you to configure access based on time, for instance, allowing access to Social Media during lunch time. Time-based access is evaluated first.
- Name the policy, and set a description.
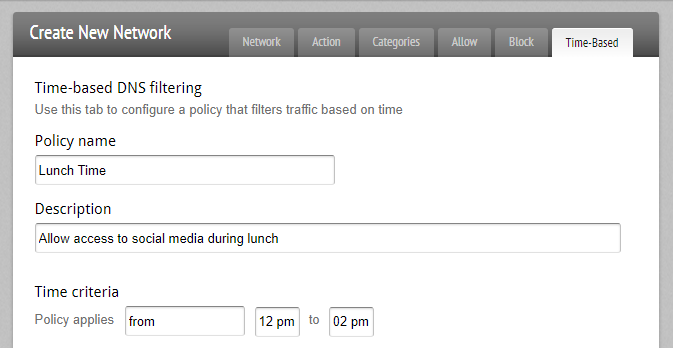
- Choose the time period that the policy applies to from the drop down. You can choose to have the policy apply from a set time to another, or have the policy outside of the set hours. Finally, you can have the policy all the time.
- Enter the domains, one per line.
- Select the categories that you want to include in the policy. A website may be categorised under more than one category.
- Choose whether the policy is to Allow access, Block access, or Monitor.
Final Steps
Click Save Settings to create the network. Allow 60 seconds for the newly created network to take effect.
To confirm that the network has been created successfully, perform a DNS lookup for test.rawstream.com against Rawstream DNS. The command should return 45.79.166.125.
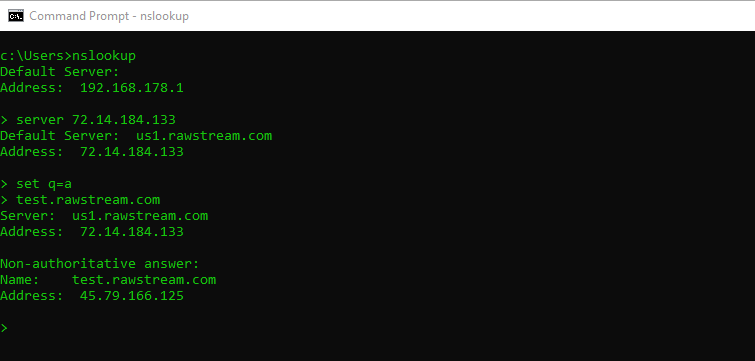
On Linux you can use the dig command: dig +short test.rawstream.com @72.14.184.133. The command should return 45.79.166.125

If the lookup for test.rawstream.com times out then the most likely reason is a mismatch between the public IP set in the newly-created network, and the public IP of the network the query is being made from.
You can find your public IP address here
Configuring the network to use Rawstream DNS
Once you've configured the Rawstream dashboard, the final step is setting the network to use Rawstream DNS.
To set up forwarding on your network, guest WiFi, or Active Directory environment follow this guide.